Keeping your data safe is crucial, and that applies to your ElastiCache service as well! Regularly backing up your ElastiCache data ensures that you can quickly recover from unexpected events or data loss. This blog post will guide you through a simple and effective process: exporting your ElastiCache backups to Amazon S3 storage.
Why S3?
Storing backups in S3 offers several benefits:
- Durability: S3 provides highly durable storage, ensuring your backups are safe and readily accessible when needed.
- Scalability: S3 scales seamlessly to accommodate any amount of backup data you need.
- Security: S3 offers robust security features to protect your sensitive information.
Let's Get Started!
Here's a step-by-step guide on exporting your Elasticache backups to S3:
Step 1: Create a Backup for AWS Elasticache
You can create a manual backup of a cache using the AWS Management Console, the AWS CLI, or the ElastiCache API.
To create a backup of a cache using the console:
- Sign in to the AWS Management Console and open the ElastiCache console at
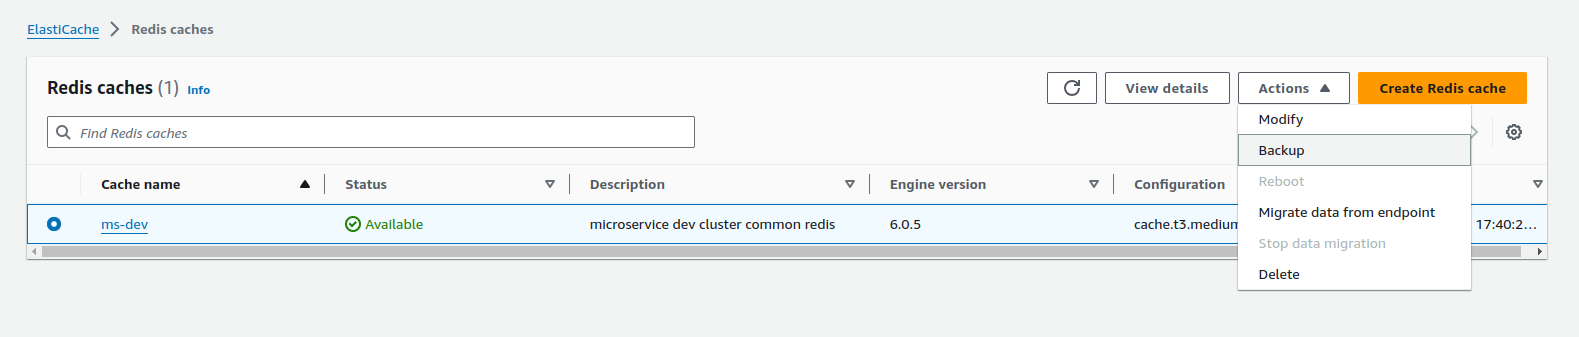
https://console.aws.amazon.com/elasticache/. - From the navigation panel, choose Redis caches.
- Select the Redis cluster you want to back up by checking the box next to its name.
- Choose Backup.
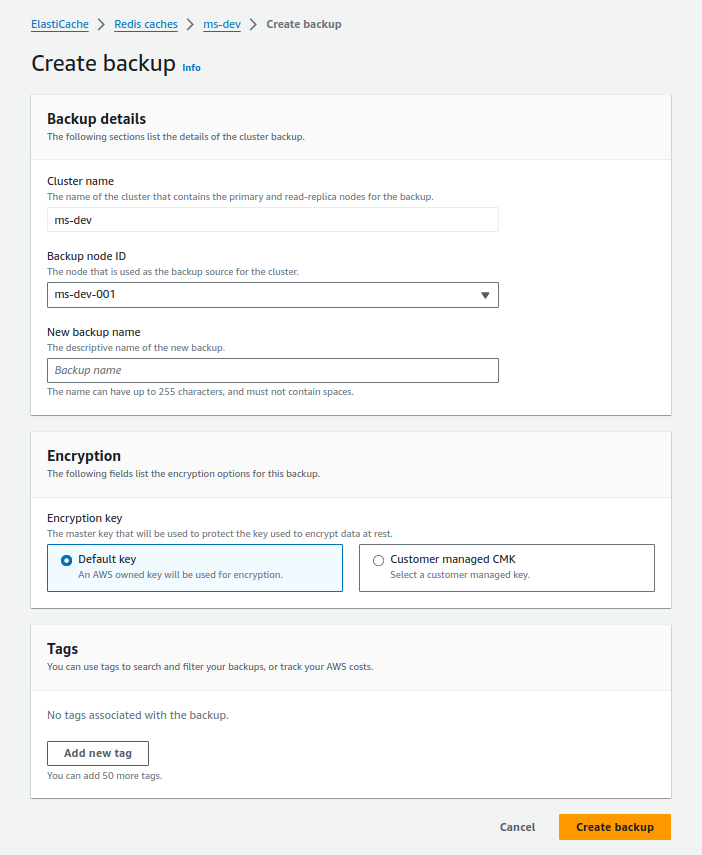
- In the Create Backup dialog, enter a name for your backup in the Backup Name box. It is recommended that the name indicate which cluster was backed up and the date and time the backup was made.
- Must contain 1–40 alphanumeric characters or hyphens.
- Must begin with a letter.
- Cannot contain two consecutive hyphens.
- Cannot end with a hyphen.
- Choose Create Backup. The status of the cluster will change to "snapshotting."
Cluster naming constraints:
To create a manual backup of a cache using the AWS CLI:
- Use the create-serverless-snapshot AWS CLI operation with the following parameters:
- --serverless-cache-name – The name of the serverless cache that you are backing up.
- --serverless-cache-snapshot-name – The name of the snapshot to be created.
For Linux, macOS, or Unix:
aws elasticache create-serverless-snapshot \
--serverless-cache-name CacheName \
--serverless-cache-snapshot-name bkup-20231127
By following these steps, you can create a manual backup of your ElastiCache Redis cluster using either the AWS Management Console or the AWS CLI.
Step 2: Create an S3 Bucket to export the backup
The following steps guide you through using the Amazon S3 console to create a bucket where you can export and store your ElastiCache backup.
To create an Amazon S3 bucket:
- Sign in to the AWS Management Console and open the Amazon S3 console at https://console.aws.amazon.com/s3/.
- Choose Create Bucket.
- In the "Create a Bucket - Select a Bucket Name and Region" section, do the following:
- In Bucket Name, enter a name for your bucket. The name must be DNS-compliant to ensure ElastiCache can access your backup file. The rules for DNS compliance are:
- Names must be 3-63 characters long.
- Names must consist of one or more labels separated by periods (.), with each label:
- Starting with a lowercase letter or number.
- Ending with a lowercase letter or number.
- Containing only lowercase letters, numbers, and dashes.
- Names cannot be formatted as an IP address (e.g., 192.0.2.0).
- From the Region list, choose an AWS Region for your bucket. This must be the same Region as the ElastiCache backup you want to export.
- Choose Create.
For more details on creating an S3 bucket, see Creating a bucket in the Amazon Simple Storage Service User Guide.
Step 3: Grant ElastiCache Access to Your Amazon S3 Bucket
To allow ElastiCache to copy a snapshot to an S3 bucket, you must update the bucket policy to grant ElastiCache access.
Warning: Although backups copied to an S3 bucket are encrypted, your data can be accessed by anyone with access to the bucket. It's strongly recommended to set up IAM policies to prevent unauthorized access. For more information, see Managing access in the Amazon S3 User Guide.
To grant ElastiCache access to an S3 bucket:
- Sign in to the AWS Management Console and open the Amazon S3 console at https://console.aws.amazon.com/s3/.
- Choose the name of the S3 bucket you created in Step 2.
- Choose the Permissions tab, then under Permissions, choose Access Control List (ACL) and select Edit.
- Add the grantee with the following Canonical ID and permissions:
- Canonical ID:
540804c33a284a299d2547575ce1010f2312ef3da9b3a053c8bc45bf233e4353 - Objects: List, Write
- Bucket ACL: Read, Write
- Choose Save.
NOTE:
For the PDT GovCloud Region, use Canonical ID:
40fa568277ad703bd160f66ae4f83fc9dfdfd06c2f1b5060ca22442ac3ef8be6.
For the OSU GovCloud Region, use Canonical ID:
c54286759d2a83da9c480405349819c993557275cf37d820d514b42da6893f5c.
Step 4: Export an Elasticache Backup to Amazon S3
Now that you've set up your S3 bucket and given ElastiCache permission to access it, you can export your snapshot. You can do this using the ElastiCache console, the AWS CLI, or the ElastiCache API. Make sure the IAM user or role performing the export has the following S3 permissions:
{
  "Version": "2012-10-17",
  "Statement": [{
    "Effect": "Allow",
    "Action": [
      "s3:GetBucketLocation",
      "s3:ListAllMyBuckets",
      "s3:PutObject",
      "s3:GetObject",
      "s3:DeleteObject",
      "s3:ListBucket"
    ],
    "Resource": "arn:aws:s3:::*"
  }]
}
These permissions allow you to perform necessary actions like checking the bucket location, listing your buckets, and managing objects in the bucket.
Steps to Export an ElastiCache Backup to Amazon S3
- Open the ElastiCache console at https://console.aws.amazon.com/elasticache/.
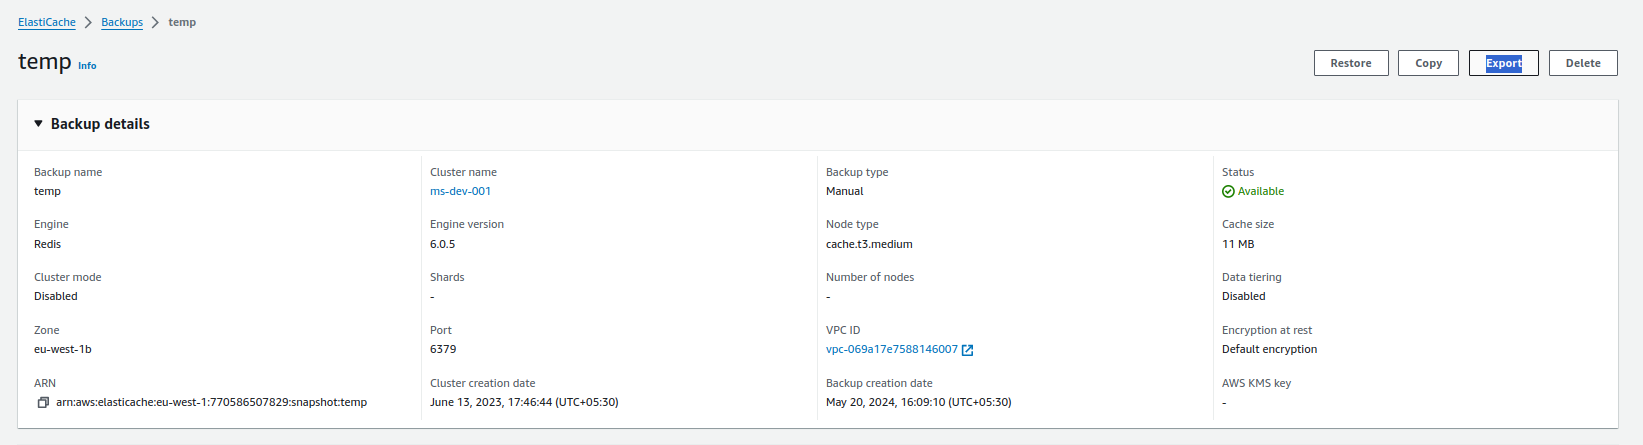
- In the left navigation panel, choose Backups to see a list of your backups.
- From the list of backups, select the checkbox next to the name of the backup you want to export.
- Click on Export.
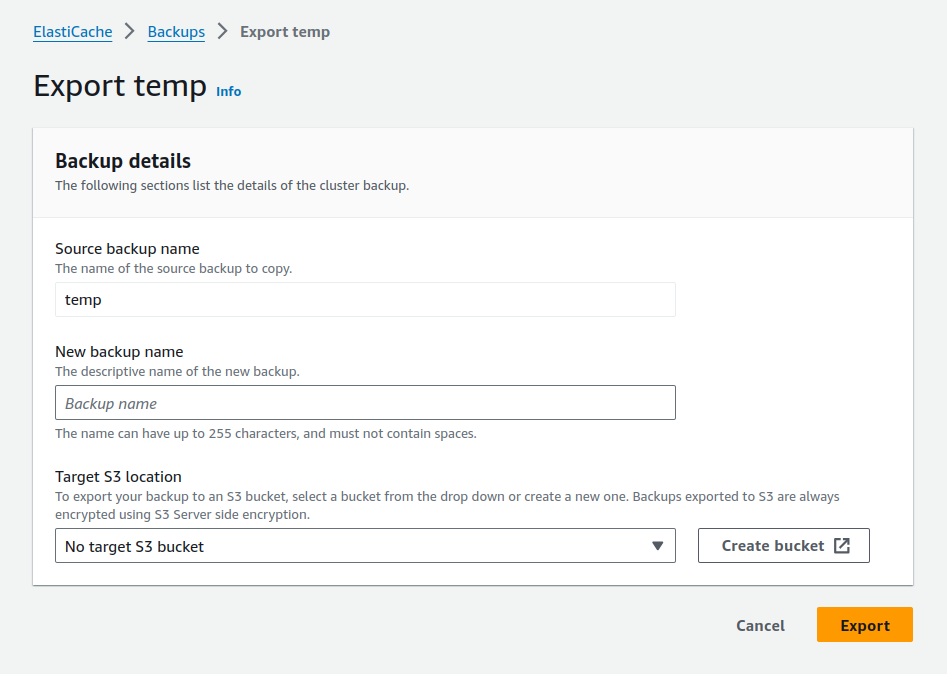
- In the Export of the Backup window, do the following:
- New backup name: Enter a name for your new backup.
- The name must be between 1 and 1,000 characters and be UTF-8 encoded.
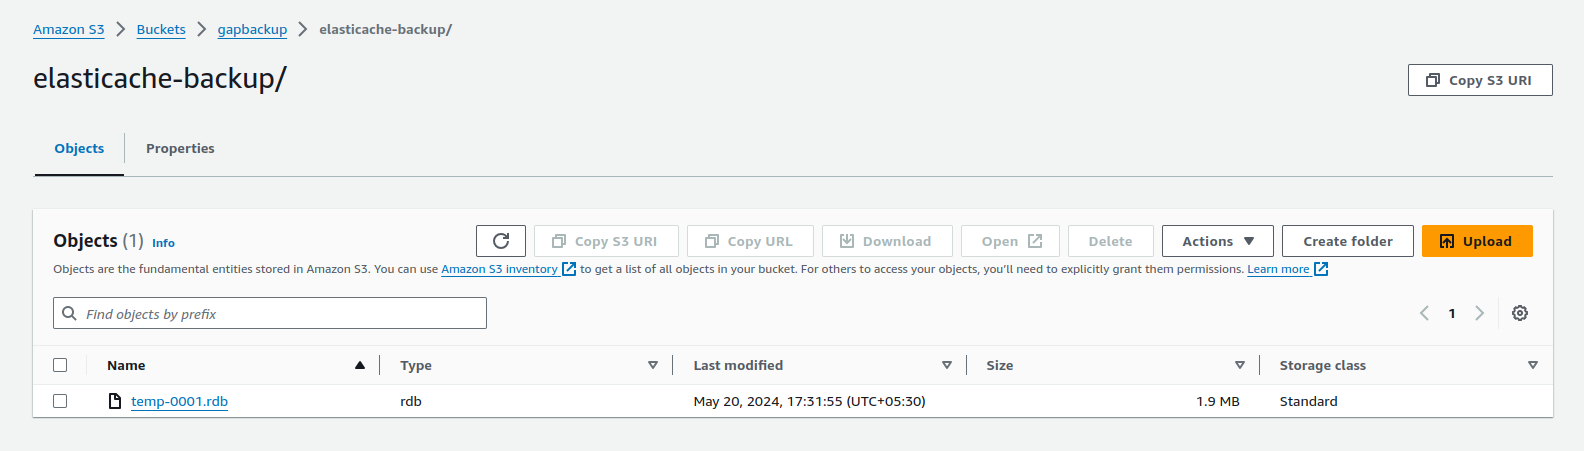
- ElastiCache will add an instance identifier and .rdb to your entered name. For example, if you enter my-exported-backup, ElastiCache will create my-exported-backup-0001.rdb.
- Target S3 Location: Select the name of the Amazon S3 bucket where you want to copy your backup (the bucket you created in Step 1)
- Permissions for the S3 Bucket
- Ensure the S3 bucket has the following permissions:
- Object access: Read and Write
- Permissions access: Read
- For more information, see Step 3: Grant ElastiCache access to your Amazon S3 bucket.
- Confirm the Export
- Click Export to start the export process.
By following these steps, you can successfully export your ElastiCache backup to an Amazon S3 bucket, making it accessible from outside ElastiCache.
Conclusion
Exporting ElastiCache backups to Amazon S3 is a simple and effective way to ensure your data is secure and accessible. By following these steps, you can easily create and store backups in S3, benefiting from its durability and scalability. Regular backups and proper permissions help maintain data integrity and readiness for recovery, ensuring your ElastiCache data is always protected.