Apache superset is a modern enterprise ready business intelligence web application started by Airbnb. This article explaining about apache superset basics, its architecture, deployment and making public using ingress, comparison with existing tools
- What is apache superset and Importance of data exploration ?
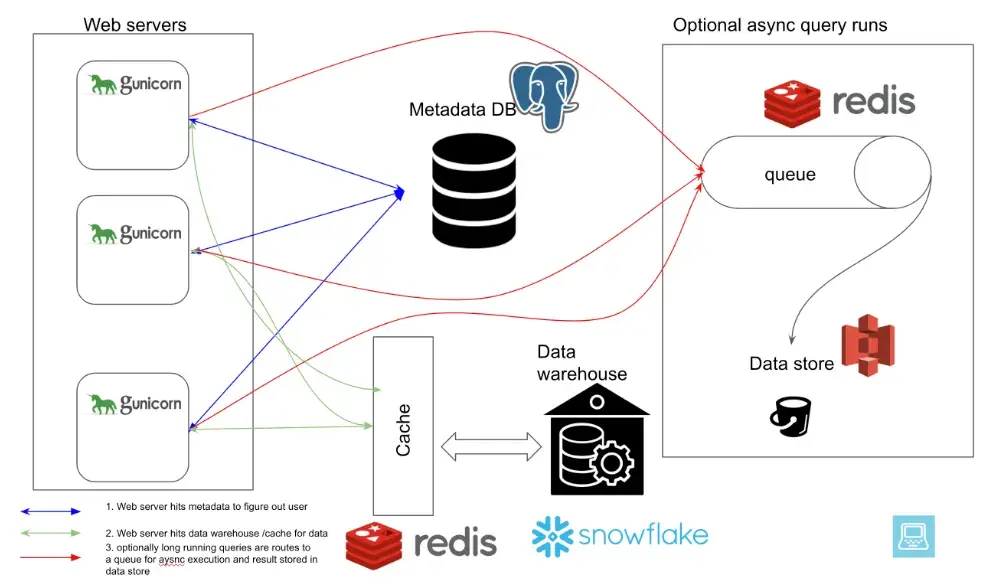
- Architecture of Apache Superset
- Installation in GCP on Kubernetes using Helm chart
- Adding Ingress and Using Apache Superset in Public
- Using Apache Superset
- Comparison with other tools
- Conclusion
1. What is apache superset and Importance of data exploration?
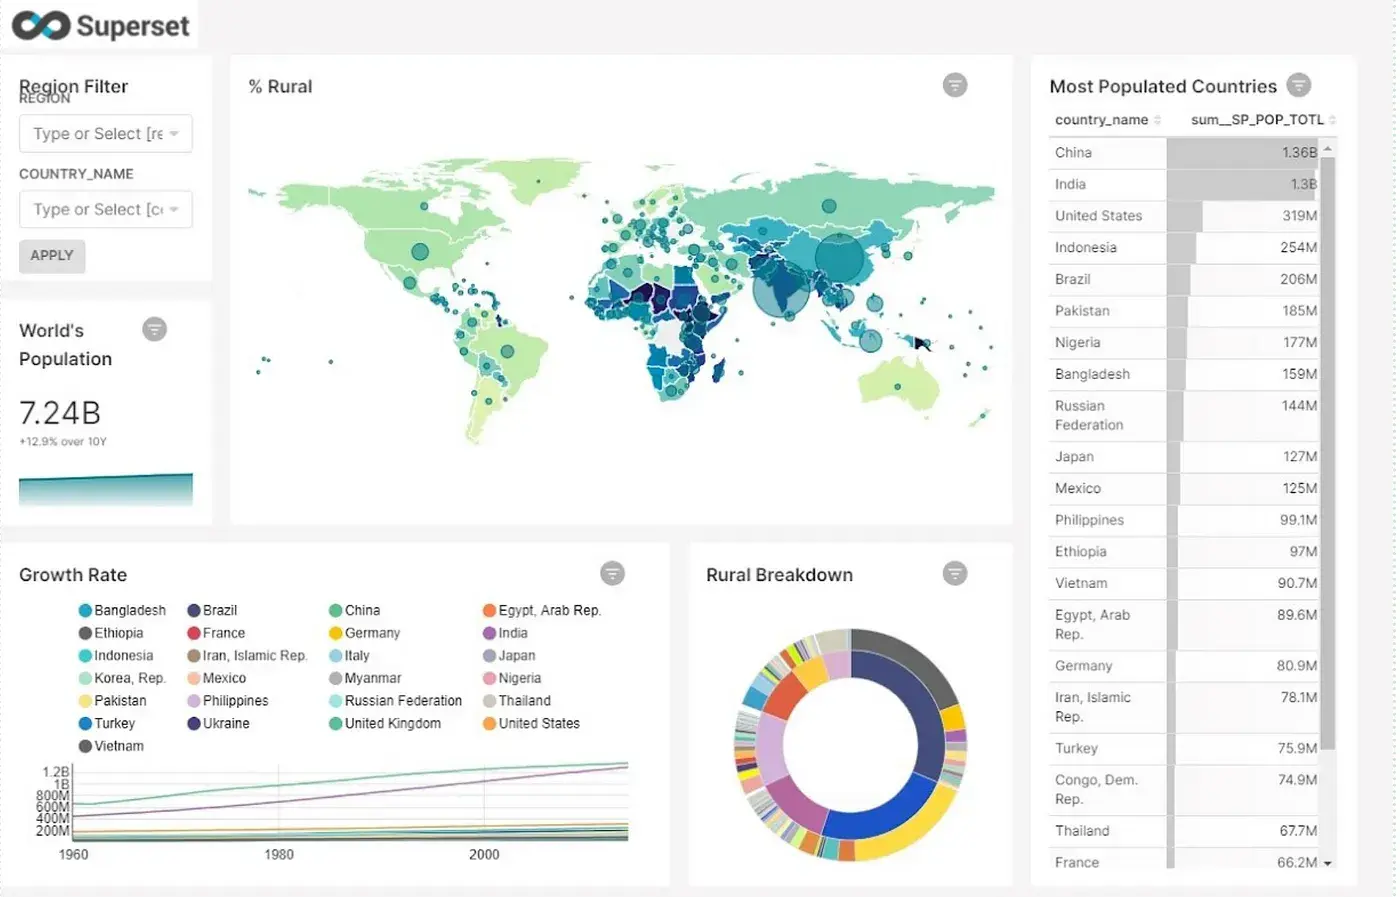
Apache superset is a modern data exploration and visualization platform , It is fast ,lightweight and intuitive and loaded with options that make users of all skill set from simple line chart to highly detailed bar geospatial charts. It is good open source alternative to expensive BI tools like Looker, Tableau, Microsoft Power BI Desktop, Sisense etc..
Data exploration is the phase where one tries to understand the data in hand and how different variable interact with each other.In most of the companies end users of data warehouse are analysts, business people, data scientists, ML engineers, for the exploration is a crucial step to find pattern, anomalies and producing insights.
Superset started in the Apache incubator back in 2016 and quickly became one of its top priority projects coinciding with the recent stable release at the beginning of 2021. It is a modern, lightweight, cloud-native, free, and open-source BI web application with an advantageous SQLAlchemy python backend, making it scalable and compatible with almost any database technology speaking SQL. To reflect its increasing popularity, Airbnb, Twitter, Netflix, Amex, and many other companies have already started incubating Superset in their workflows, while Dropbox managed to successfully exploit its advantages at an enterprise level.
2. Architecture of Apache Superset
Apache superset is built entirely on top of Python, it consists of
- Webserver
- Metadata Database
- Cache Layer
- Message queue for async queries
- Results Backend
Stack:
ES6 Javascript Frontend
- React / Redux
- webpack / eslint / jest
- Broken down as many packages @supserset-ui/*
- nvd3, data-ui (VX), blocks, …
Python Backend
- Flask.* + Flask App Builder
- Pandas
- SQLAlchemy (ORM + SQL Toolkit)
- Many utility libs (sqlparse, dateutils, …)
The web servers that serve UI can scale independently using load balancer group. Using Redis cache dashboard load can load without hitting to data warehouse. SQLAlchemy is used to connect to different databases.
3. Installation in GCP on Kubernetes using Helm chart
1. create a free GCP account
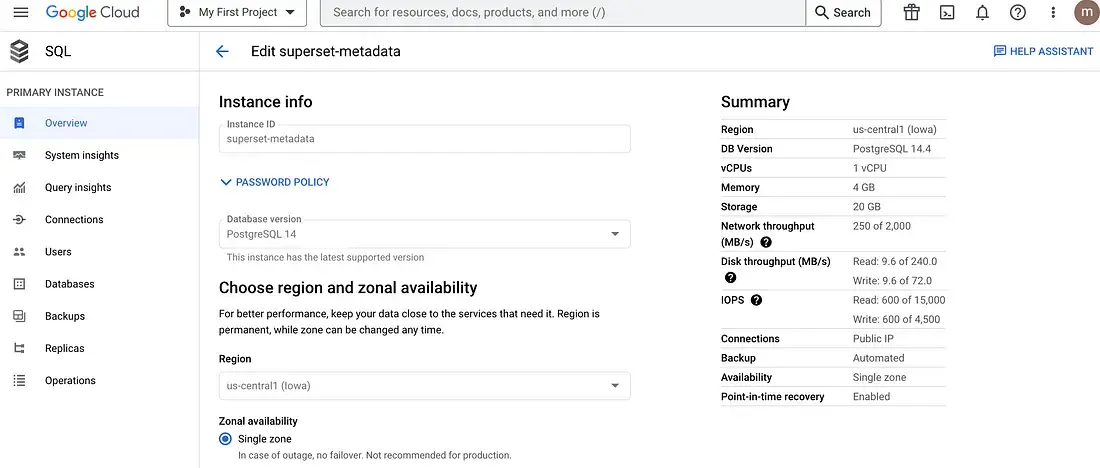
2. create a metadata database.
Currently I’m using a managed database. The reason being that whatever happens to the server, the metadata shall be secure and safe.
create a postgres instant
connect to data base and create a user
gcloud sql connect superset-metadata - user=postgres - quiet
create database superset-metadata;
create user superset with password 'admin'
grant all on database superset_metadata to superset;
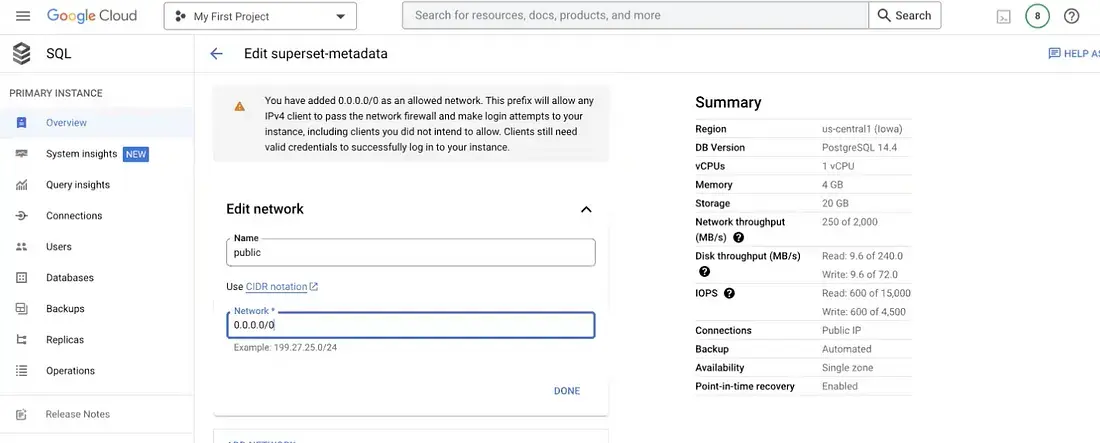
update network to connect externally
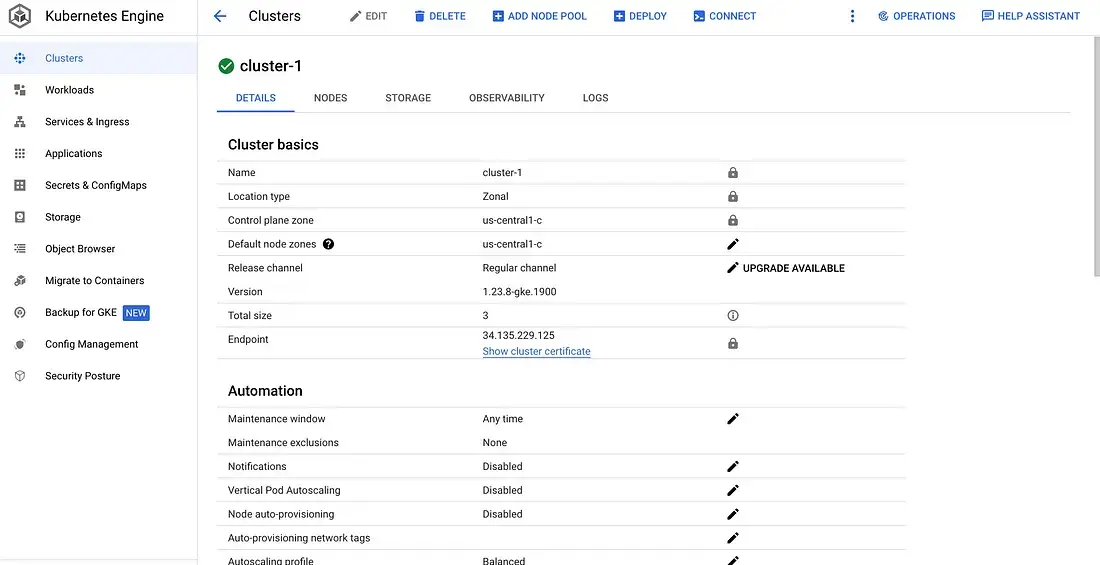
3. Create a Kubernetes instance and connect via kubctl
4. Download and configure superset helm chart and configure values.yaml
https://github.com/apache/superset/releases/tag/superset-helm-chart-0.6.3
update the bootstarp script with the required packages.I want to connect to bigquerry data warehouse, so I'm adding few bigquery related packages
bootstrapScript: |
  #!/bin/bash
  rm -rf /var/lib/apt/lists/* && \
  pip install \
    psycopg2-binary==2.9.1 \
    redis==3.5.3  \
    sqlalchemy-bigquery \
    pybigquery && \
  if [ ! -f ~/bootstrap ]; then echo "Running Superset with uid {{ .Values.runAsUser }}" > ~/bootstrap; fi
update meta database connection information
extraEnv:
  # Extend timeout to allow long running queries.
  # GUNICORN_TIMEOUT: 300
  DB_HOST: 'xx.xxx.xxx.xx'
  DB_USER: ''superset'
  DB_PORT: ''5432'
  DB_NAME: ''superset_metadata'

extraSecretEnv:
  # MAPBOX_API_KEY: ...
  # # Google API Keys: https://console.cloud.google.com/apis/credentials
  # GOOGLE_KEY: ...
  # GOOGLE_SECRET: ...
  DB_PASS: "xxxx"
update the config overrides
configOverrides:
  feature_flags_settings: |
    import ast
    FEATURE_FLAGS = {
            "ALERT_REPORTS": True,
            'ENABLE_TEMPLATE_PROCESSING': True,
            "ENABLE_EXPLORE_DRAG_AND_DROP": True,
            "THUMBNAILS": True,
            'DASHBOARD_RBAC': True,
            'ROW_LEVEL_SECURITY': True,
            'OMNIBAR': True,
            'DASHBOARD_NATIVE_FILTERS_SET': True,
            'DASHBOARD_NATIVE_FILTERS': True,
            'DASHBOARD_CROSS_FILTERS': True,
            "GLOBAL_ASYNC_QUERIES": True,
    }
  metatda_db_settings: |
    SQLALCHEMY_DATABASE_URI = f"postgresql+psycopg2://{os.getenv('DB_USER')}:{os.getenv('DB_PASS')}@{os.getenv('DB_HOST')}:{os.getenv('DB_PORT')}/{os.getenv('DB_NAME')}"
  session_settings: |
    from flask import session
    from flask import Flask
    SECRET_KEY = 'hXXXXXXXXXXXXXXXXXXXXXXXXXXXXXXXXXXXXXXXXXXXXXXXXXX'
    WTF_CSRF_ENABLED = False
  cache_config: |
    CACHE_CONFIG = {
      'CACHE_TYPE': 'redis',
      'CACHE_DEFAULT_TIMEOUT': 24*60*60, # 1 day
      'CACHE_KEY_PREFIX': 'superset_',
      'CACHE_REDIS_URL': 'redis://%s:%s/1' % (env('REDIS_HOST'), env('REDIS_PORT'))
    }
    DATA_CACHE_CONFIG = {
      'CACHE_TYPE': 'redis',
      'CACHE_DEFAULT_TIMEOUT': 24*60*60, # 1 day
      'CACHE_KEY_PREFIX': 'data_',
      'CACHE_REDIS_URL': 'redis://%s:%s/1' % (env('REDIS_HOST'), env('REDIS_PORT'))
    }
  global_async_settings: |
    GLOBAL_ASYNC_QUERIES_REDIS_STREAM_PREFIX = "async-events-"
    GLOBAL_ASYNC_QUERIES_REDIS_STREAM_LIMIT = 1000
    GLOBAL_ASYNC_QUERIES_REDIS_STREAM_LIMIT_FIREHOSE = 1000000
    GLOBAL_ASYNC_QUERIES_JWT_COOKIE_NAME = "async-token"
    GLOBAL_ASYNC_QUERIES_JWT_COOKIE_SECURE = False
    GLOBAL_ASYNC_QUERIES_JWT_COOKIE_DOMAIN = None
    GLOBAL_ASYNC_QUERIES_JWT_SECRET = "xxxxxxxxxxxxxxxxxxxxxxxxxxxxxxxxxxx"
    GLOBAL_ASYNC_QUERIES_TRANSPORT = "polling"
    GLOBAL_ASYNC_QUERIES_POLLING_DELAY = 1500
    GLOBAL_ASYNC_QUERIES_WEBSOCKET_URL = "ws://superset-websocket:8080/"
    GLOBAL_ASYNC_QUERIES_REDIS_CONFIG = {
        "port": env('REDIS_PORT'),
        "host": env('REDIS_HOST'),
        "password": "",
        "db": 0,
        "ssl": False,
    }
Please make sure you add and rotate the secret key.This is used to encrypt all user credentials.
update the below also to load the samples
init:
  loadExamples: true
install helm char using the following command
helm upgrade -n superset --install --values /path/to/superset/helm/values/file/values.yaml superset superset/superset --version 0.6.3 --debug
check the pods are listing and running without any problem after helm installation using below command
kubectl get pods -n superset
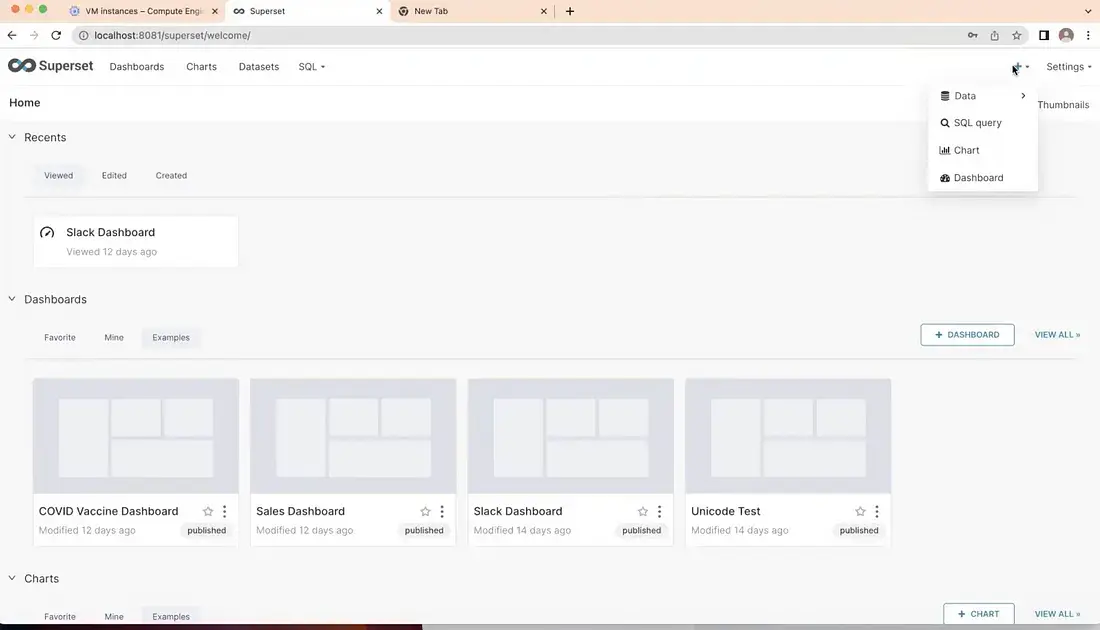
once started running all pods. port forward and open the application in local using the below command
kubectl port-forward service/superset 8087:8088 --namespace superset
some kubectl commands which help to debug and log the clusters
#for creating name space
kubectl create namespace superset
#for listing all pods under a namespace
kubectl get pods -n superset
#executing a pod
kubectl exec -it superset-85fddfdf45-4t7wf -n superset /bin/sh
#deleting a pod if required
kubectl delete pod superset-celerybeat-6b5449c4b4-k5wfc -n superset
#port forwarding to local
kubectl port-forward service/superset 8087:8088 --namespace superset
#logs of superset pods
kubectl logs -n superset superset-init-db-t7h4f
#watch logs while running
watch kubectl logs superset-6d85d75b4d-4vzkb -n superset
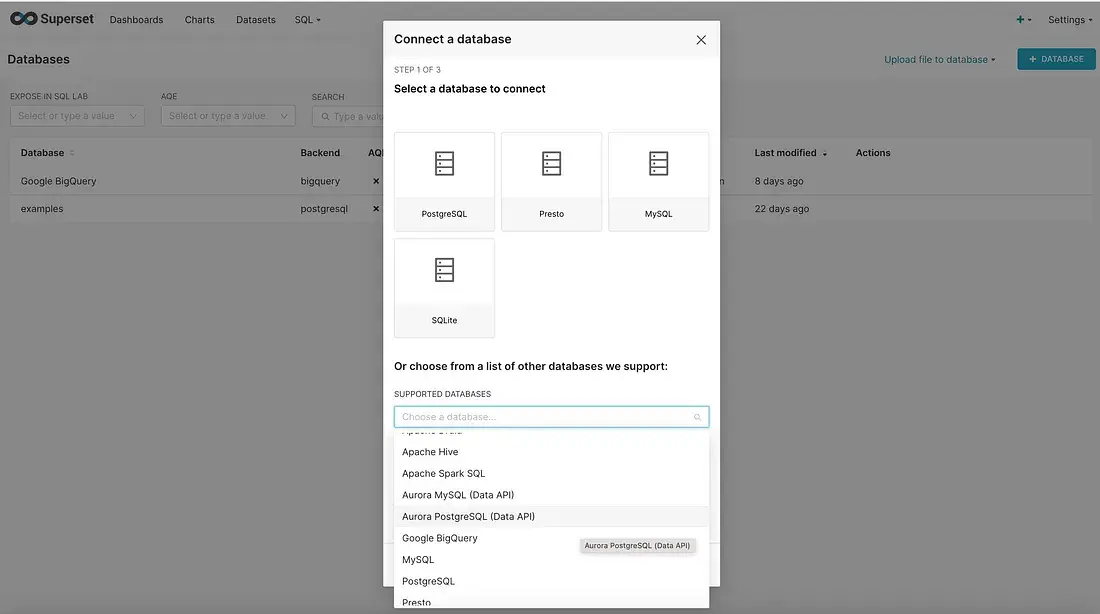
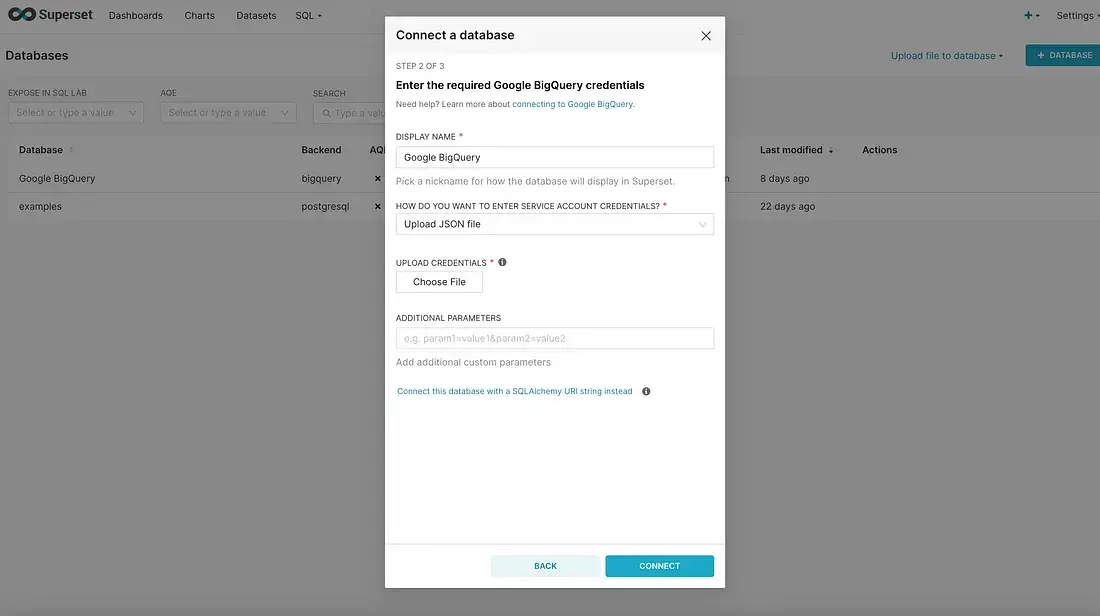
After that connect to bigquery from connect to a database
4. Adding Ingress and Using Apache Superset in Public
The idea is to have an Nginx controller as the only entry point to my Kubernetes cluster. This controller will have a public IP address and route the traffic to the right microservices. For this demo, it is enough to have two replicas but for your production environment, you might want to use three or more. You can configure it with the –set controller.replicaCount=2 flag
kubectl create namespace ingress-basic

helm repo add ingress-nginx https://kubernetes.github.io/ingress-nginx

helm install nginx-ingress ingress-nginx/ingress-nginx \
    --namespace ingress-basic \
    --set controller.replicaCount=2 \
    --set controller.nodeSelector."beta\.kubernetes\.io/os"=linux \
    --set defaultBackend.nodeSelector."beta\.kubernetes\.io/os"=linux \
    --set controller.admissionWebhooks.patch.nodeSelector."beta\.kubernetes\.io/os"=linux

kubectl --namespace ingress-basic get services -o wide -w nginx-ingress-ingress-nginx-controller
we need to configure apache superset helm chart to use ingress. change your ingress file according to your domain
ingress:
  enabled: true
  ingressClassName: nginx
  annotations:
    nginx.ingress.kubernetes.io/enable-cors: "true"
    nginx.ingress.kubernetes.io/cors-allow-origin: "https://*.website.com, http://*.website.com, *.website.com"
    nginx.ingress.kubernetes.io/cors-allow-headers: "content-type, auth-token"
    nginx.ingress.kubernetes.io/cors-allow-methods: "GET, POST, OPTIONS"
    nginx.ingress.kubernetes.io/proxy-connect-timeout: "3000"
  path: /
  pathType: Prefix
  hosts:
    - dashboard.website.ai
add A record and subdomain in your domain provider and add update your external ip generated from ingress service.
5. Using Apache Superset
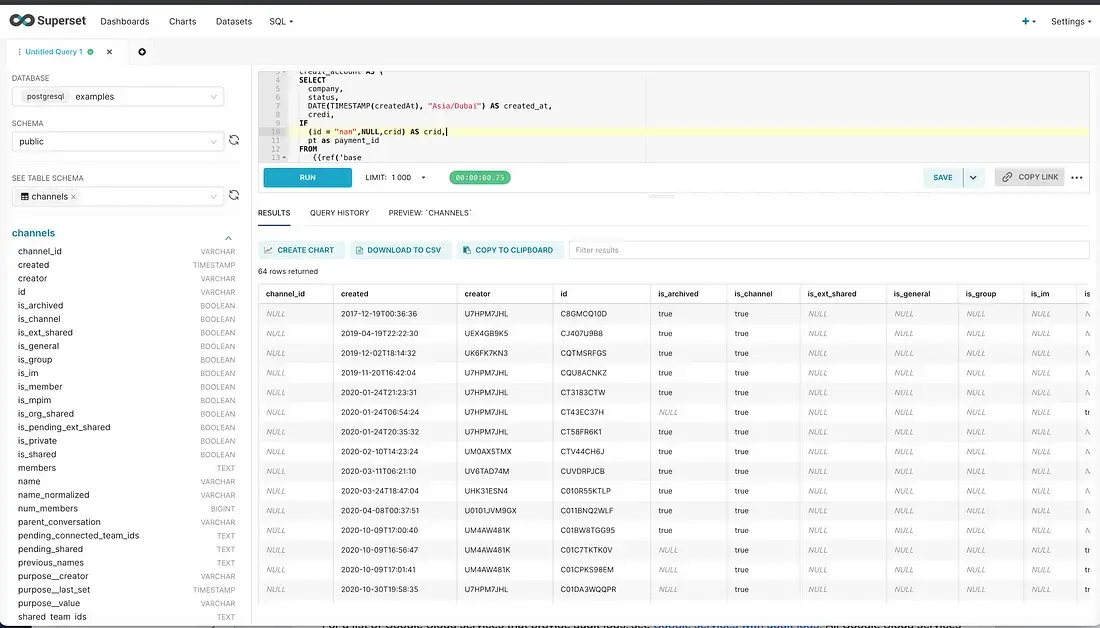
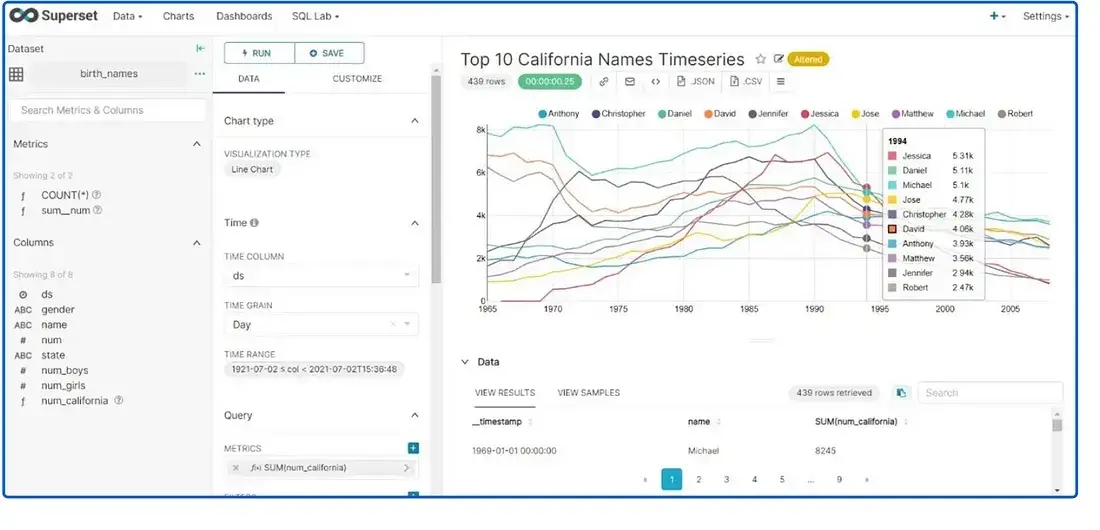
Apache superset essentially stands in 3 layer, Dashboarding, Data exploration and SQL Lab
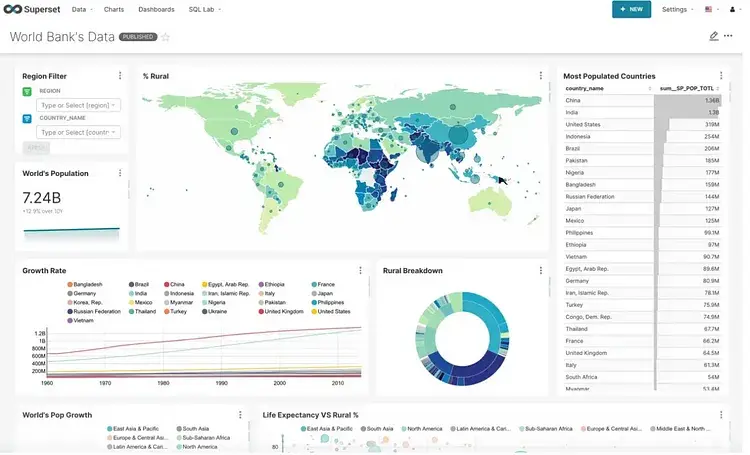
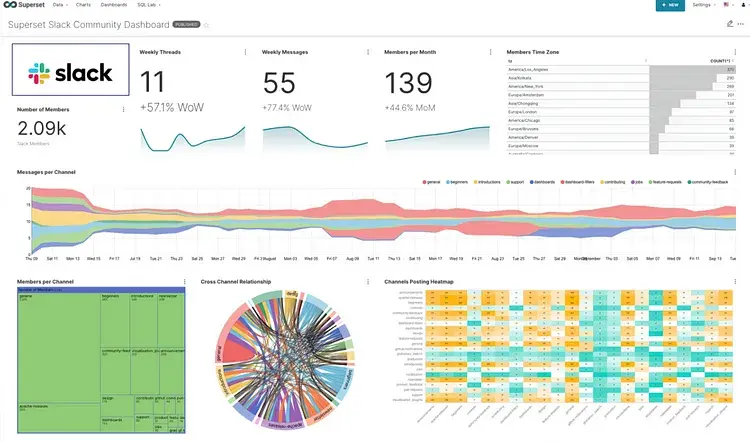
Dashboarding : Superset have seamless interaction with wide range of tool tips and we assemble chart as drag and drop with the help of grid lines.
SQL LAB:
Data Exploration :
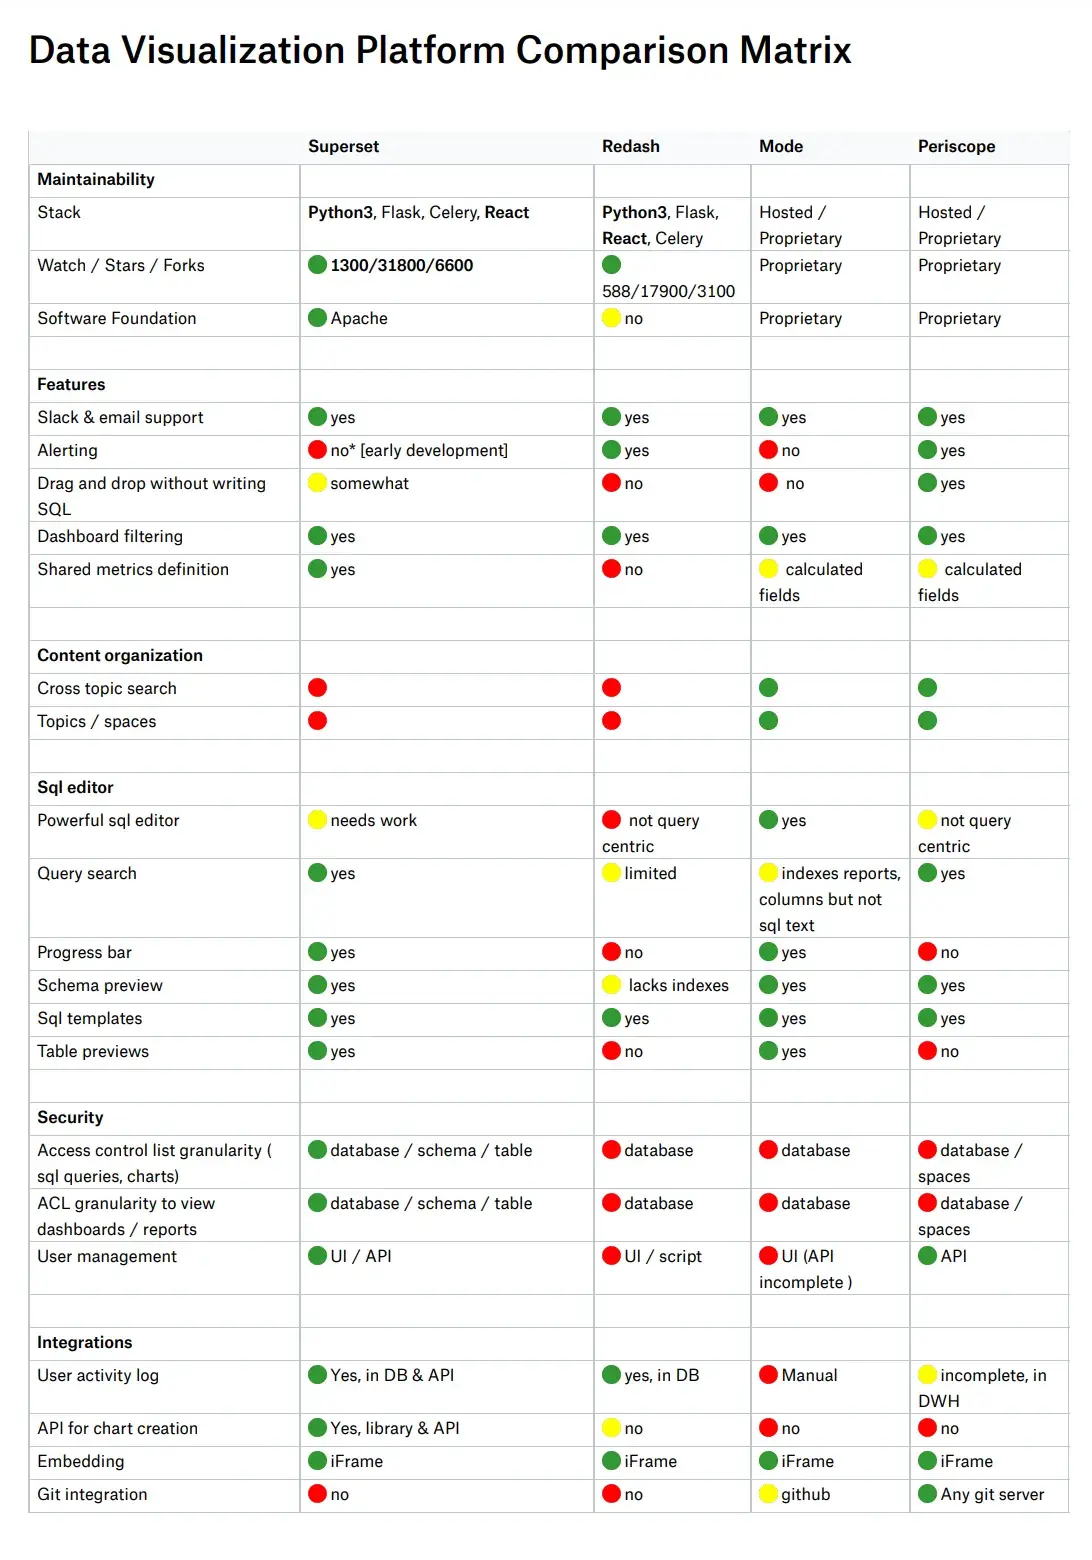
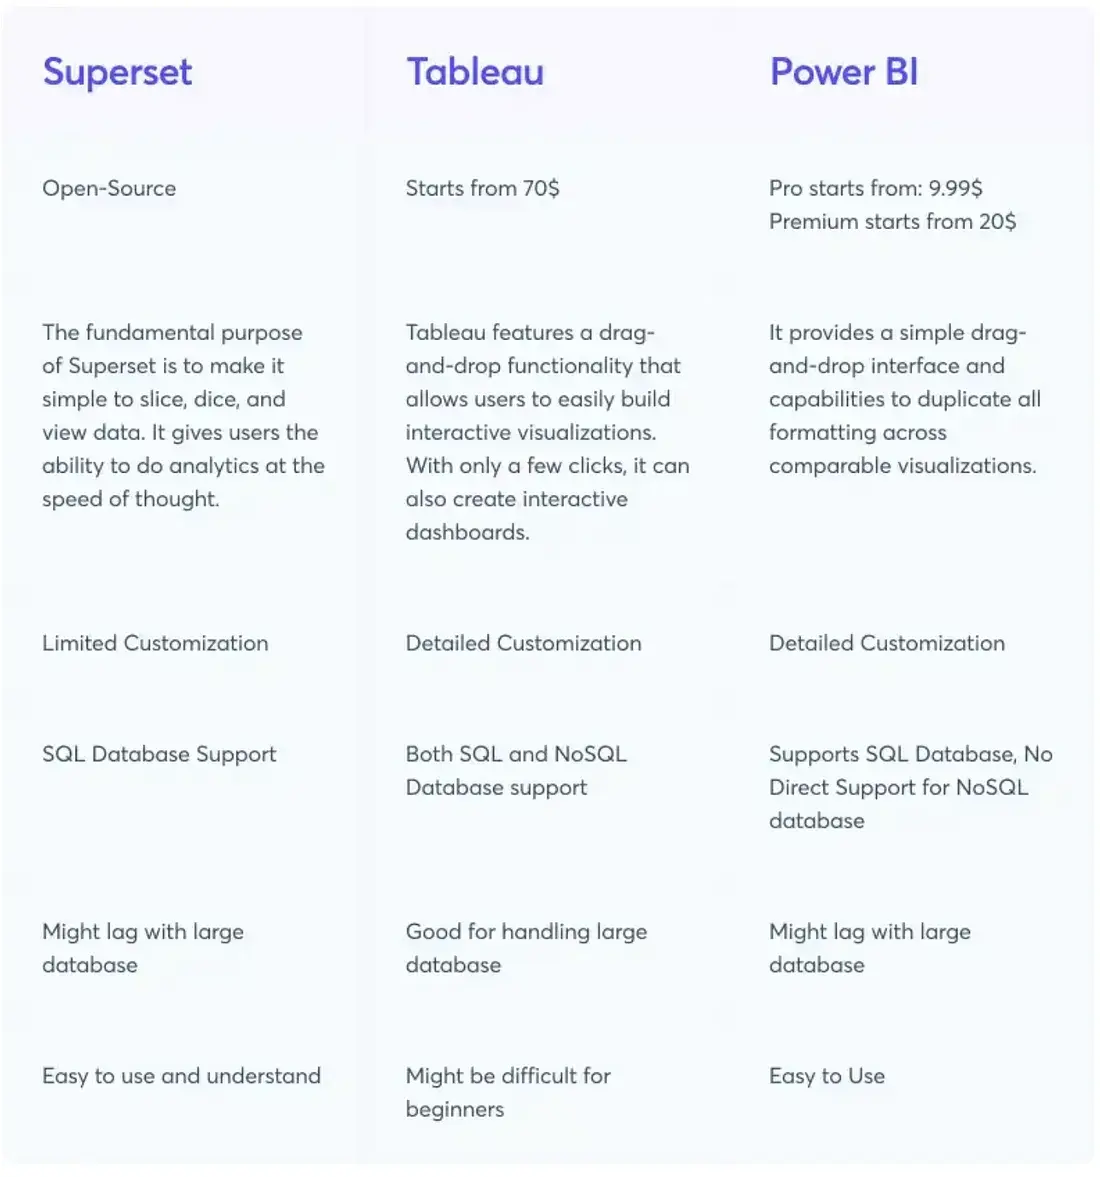
6. Comparison with other tools
7. Conclusion
In the era of commercial tools like Tableau, Power BI, Looker ruling the market, Superset is getting popular at a faster pace given its free and open source and the learning curve being comparatively low. For the requirements of flexible metrics/semantic/visualization layer arises, Superset is a winning open source solution.
The draw back is as any open source project initial setup and maintenance we have to do.
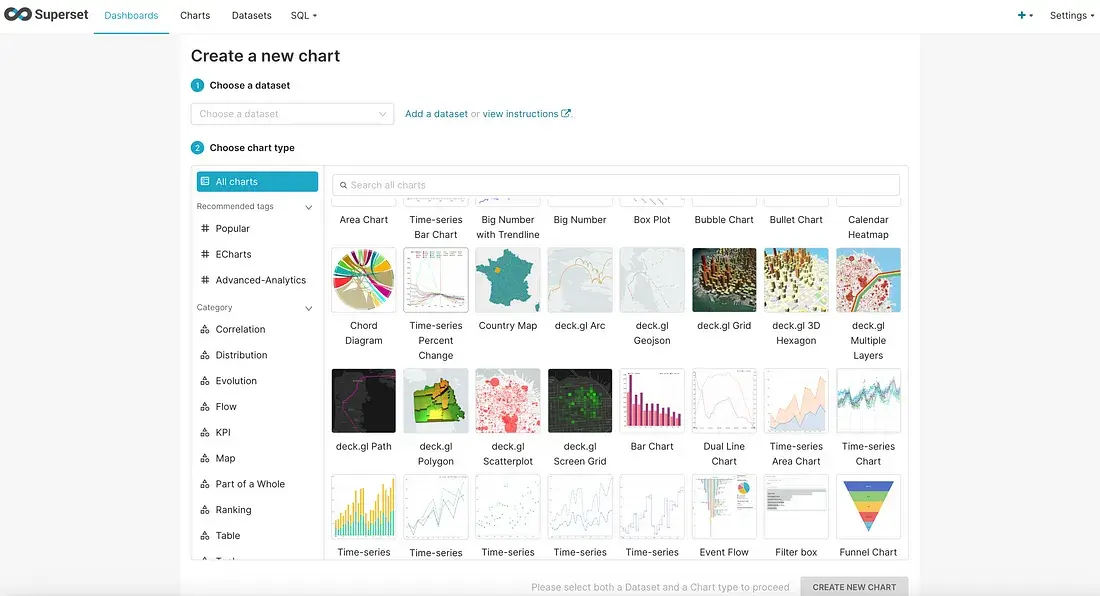
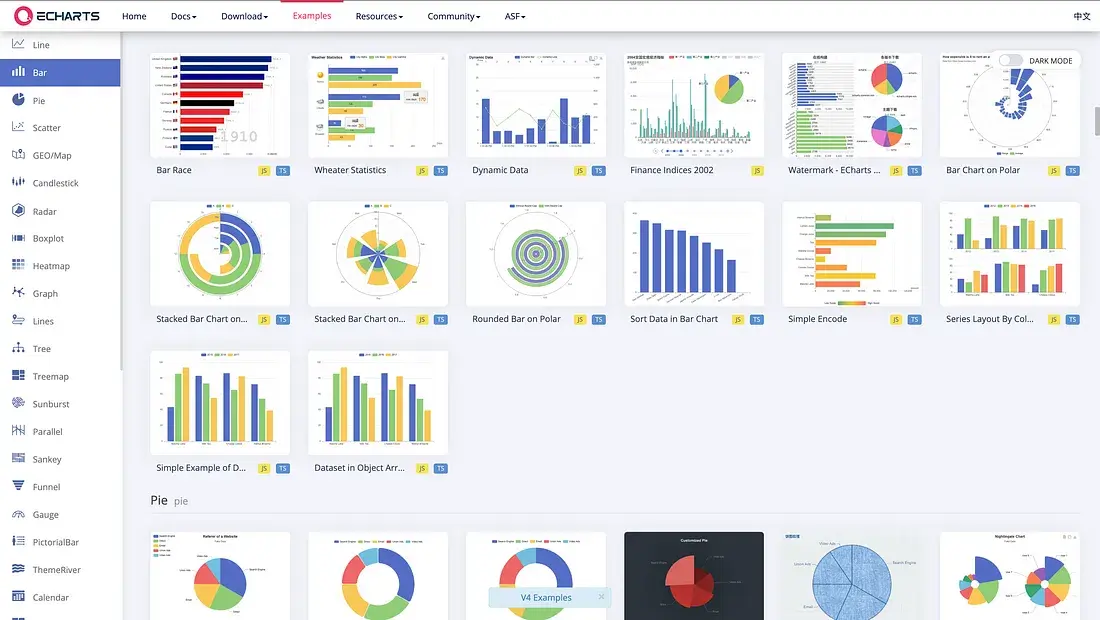
Also super set support apache echart (Need to experiment). It has wide variety of graphs

